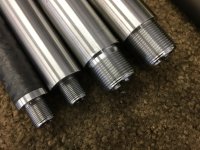
What tool / cutter setup do you use to turn rifle barrel shanks?

View attachment 25351

Well... a CCGT insert works fine. :)

But. But. Microscopes and surface finishes….

I used carbide inserts in my wimpy 1000-1200 lb Chinese 13x40 lathe and in my 6000 lb turning center. The turning center does produce better surface finishes, but I think that’s more to do with exact and constant surface speeds than it does rigidity. The manual still produces more than acceptable finishes with carbide inserts for any barrel fitting work.

Way I see it, for rifle work, as long as the shoulder has a shiny as-machined finish to the neked eye, what it looks like under a microscope isn’t going to make a bit of difference on target.

Then again, I’m in this to machine on barrels, not on tools. If you’re in it for hobby and enjoy grinding tools, or need a specialty profile, I’m certainly not poo-pooing you for that. But proper carbide inserts are more than good enough for rifle barrel fitting.
 
View attachment 25351

Well... a CCGT insert works fine. :)

That's a ridiculously purdy tenon but it won't work for me. :)

Seriously.

I bought some of them since this discussion started and was disappointed at the large radius of the tip. I need the roots of my tenons to be square. Or, as mentioned above I have to take a plunge cut which knocks my yielding strength back at least 25%

And for fitting muzzle devices the problem quadruplifies.....
 
Very nice as long as you do not accidentally screw up the temper when grinding.
I was taught to keep a can of water next to the grinder. Start grinding by dipping the tool blank in the water, watch the water beads while grinding, when they start sizzling away redunk. Doing it this way the cutter blank will always stay around 212*. Most people wait till they see a color change before dunking. This method may be a little slower, but you never have to worry about overheating.
 
I was taught to keep a can of water next to the grinder. Start grinding by dipping the tool blank in the water, watch the water beads while grinding, when they start sizzling away redunk. Doing it this way the cutter blank will always stay around 212*. Most people wait till they see a color change before dunking. This method may be a little slower, but you never have to worry about overheating.

I use a jug of water and a magnetic mister to literally bathe the edge in water droplets and can grind tools without ever a sizzle..... also have a hollow wheeled tool grinder which feeds water into the inside the wheels like this > https://www.normanmachinetool.com/wp-content/uploads/2019/04/BALDOR-500-GRINDER-BUFFER-2.jpg < except mine has good wheels and a greenstone for carbide.... I can grind and hone me some HSS ;)
 
Here's where I join the "show me" state. I have heat treating ovens (well, down to one) and thermocouples (like the one in my oven) are no mystery. You muck with a piece of high-quality HSS and you're not getting back to the homogeneous hardness of the manufacturer. You can't quench the center of a piece of metal - you'll always be quenching the outside and much later that 'coolness' reaches the center. As I said, you can play with O-1 and W-1, exactly as you've described, but do it with HSS and you're just ruining a good tool blank. A good piece of HSS was created with multiple processes generally outside those practical for the home-jobber. You need *hours* of soak at specific temperatures, in oxygen-free environments, to achieve the same hardness / temper through and through. The idea of a hard exterior over a ductile core has merit - that's what you can do with high-carbon steels, but it'll never match the quality of HSS for lathe work.

GsT
Gene,
You are 100% correct! I have been grinding and using HSS for the last sixty years on my old antique south bend lathes. 99% of my bits I grind by hand including my threading bits. In the old days some of the twist drills and tool bits were high carbon steel.These did a good job IF you kept the heat away from them. I keep a can of water handy when I am grinding HSS to keep from burning my fingers. I’m not concerned about changing the hardness even if I get a change in color. The same cannot be said for high carbon steel. In other words if my HSS changed color while grinding it I never could detect any difference in the way it performed. In fact we used to silver solder ( red heat) a piece of HSS to make up a boring bar for small jobs. How long it would have lasted I don’t know but it got the job done!
 
That's a ridiculously purdy tenon but it won't work for me. :)

Seriously.

I bought some of them since this discussion started and was disappointed at the large radius of the tip. I need the roots of my tenons to be square. Or, as mentioned above I have to take a plunge cut which knocks my yielding strength back at least 25%

And for fitting muzzle devices the problem quadruplifies.....

Is there a reason the first threads on the action or muzzle devices can't be beveled alittle to make room for the small radius on the barrel shoulder ?
Some actions have the threads releaved at the face of the action as do some muzzle devices I've seen. Less chance of the threads getting damaged and helps center the items being screwed together. Just asking, not wanting to start anything.

Hal

No Hal..... you won't ever "start anything" with me :) but I do have a real reason. It's because I build some big guns and I torque my barrels to 150ftlb..... and to do this requires some special shouldering techniques. I'm not selling anything nor arguing anything...... it's just where I am this day.


If you really are curious enough I explain it here https://www.youtube.com/watch?v=KcIjRAfLm6Q
 
Last edited:
Al

That link just takes me to YouTube to sign up.
What's the name of you YouTube video?
I'm always like to learn new ideas.

Hal
 
I am curious about this knocking the “yielding strength back at least 25%” due to a “thread relief” or plunging one cutting radius depth at the shoulder/tenon junction.

The root of the thread would be the weakest area of the tenon due to minimum diameter and stress concentrating shape of a vee. Many high stress fasteners have reduced shanks to spread the stress over the length of the fastener. Properly built axle shafts would have the majority of the shaft diameter match the root of the splines, again, to spread the stress over the entire part, rather than be concentrated at the splines.

While I do find most “thread reliefs” hideous to look at, as long as they are not less in diameter than the thread root, and have some radius, for what this part needs to do, I don’t see any real world decrease in ultimate strength or durability.
 
you obviously haven't watched the video.... this isn't theoretical. I own at least a dozen barrels with the problem and in taking off customer barrels I see it a lot.

Regardless whether others have ever found distortion of the abutment surface, I have...... and I have successfully taken steps to eliminate it.
 
That's a ridiculously purdy tenon but it won't work for me. :)

Seriously.

I bought some of them since this discussion started and was disappointed at the large radius of the tip. I need the roots of my tenons to be square. Or, as mentioned above I have to take a plunge cut which knocks my yielding strength back at least 25%

And for fitting muzzle devices the problem quadruplifies.....

Al you are ridiculous ;)

If you can't figure out a tool to quickly go in and remove the corner radius I don't know what to tell you! Put your magnifier visor on, take a sharp cornered tool (HSS or brazed carbide ground and lapped sharp) and remove the radius. No need to undercut, just remove the radius. Even if you slip and undercut a thou or two no way you can tell me that'll kill your "yielding strength" much at all let alone 25%. This should be easy peasy and I truly don't understand the problem. :)


That is of course exactly what I do..... but yes, you've not grasped the problem. While I "can" and do do that it costs me a half hour or more as I'm dealing with fractions of thousandths. I fit my shouldering collar to such a fit that I hold it under hot water, blow it dry and glue it on before it shrinks back down too tight to go on, AND know that the root is buried and leaves no gap at the shoulder. I only hand-tighten for the gluing part and if she slips even a thou to bottom out I'm afraid I'll lose the glued-joint......I'd prefer a better way...... AND, in the larger picture if you've developed other methods for producing honest .250 aggs with big 338 mags shooting 300gr VLD's I'll stand back and gape, then shake your hand and say "congratulations, you're much better than me". Add to that the fact that I'm swapping barrels and need to do it repeatably, and maintain both timing and stability...... not only will I gape and congratulate you, I'll buy a rifle from you. For Real.

I have to do a bunch of things others will not do to make this happen, this ain't no PPC.

PPC's are child's play..... I can swap barrels on the bench and hand-tighten them and stay under .250moa.... on a dozen or more guns.


As in ALL things, I'm not intending to portray that "my way is better" on anything but I started doing all this because I couldn't buy the accuracy I want. I've found it, my way, up to 300gr bullets pushed at 2750-2800fps and I'm moving up to a 50 w/750's as we speak...... I just bought a $422.00 hunk of aluminum to make the stock from.

I've been called ridiculous and worse pretty much since't I hit puberty, I'm used to it.
 
you obviously haven't watched the video.... this isn't theoretical. I own at least a dozen barrels with the problem and in taking off customer barrels I see it a lot.

Regardless whether others have ever found distortion of the abutment surface, I have...... and I have successfully taken steps to eliminate it.

I did watch the video. Maybe I missed the part about a TNR plunge at the shoulder/tenon junction. I don’t think you touched on it, but I also think a longer thread engagement adds to stability (queue the “only need three threads” crowd!).

I do absolutely agree with you that the larger diameter bearing surface adds to the stability of the joint. I just am failing to see how the undercut, which would never be a bearing surface, would reduce yield strength if it is still much larger than the thread root, and a better profile for stress flow (radius, not vee-flat-vee).

You’re obviously getting the results you’re after, and that’s all that matters. And I absolutely appreciate your experimentation. Too many see one person on the internet doing something a certain way, and never bother to even think to themselves if it makes sense.
 
And just so I’m clear, I’m taking about making a .016” (I actually program .015” because I cut my major smaller than nominal) plunge at the shoulder. Mines not quite a X only plunge (although if you draw it out, it’s pretty much the same result), I plunge at a 45* to depth, move in Z .003, then out in X for the final tenon length.

The tenon for a recoil lug illustrates it best, even though the full thread tenon has the exact same profile at the tenon/shoulder junction.
DA2CD3B3-2AE5-4E29-846A-696FB49E2314.jpeg
 
That video is part of a series of a dozen and only touches on the subject at hand, which subject being how to achieve 150ftlb torque without deforming the shouldering abutment.

There is a bigger problem at the front end when one is trying to lock down a muzzle brake using 4 contact surfaces... I can't do it the way you do it and achieve the results I'm striving for.

Again, let me be clear, I'M NOT TEACHING NOR ADVOCATING NOR COMPARING NOR KNOCKING ANYONE ELSE'S METHODS....... I'm just sharing with the world the way I do things, as I've been doing on this forum for 25yrs.

Trust me, I've been called a liar more times than I've been called "ridiculous" LOL....Hence my 15yrold innernet $1000.00 bet to the world at large about "bullets going to sleep"

A LOT of sucky guns have been sold over that worn out gag.
 
I’m certainly not calling you a liar. I appreciate all your posts, regardless if I agree with them
or not. They always inspire thinking. Thinking is good!
 
Back
Top