Building an Action

Leeroy

Another note, the basic design of the Remington 700 familly of actions, with the "THREE RINGS OF STEEL" concept, is recognized as one of the safest bolt actions ever designed.
I have seen these withsatnd a complete case head failure, and the case still contained inside the chamber and barrel assy, with no damage to the shooter.
The only drawback to the Remington design is many think the extractor is on the weak side. Sure, it might be when compared to a Sako style, but that is a compromise that had to be made in order to insure that the "three rings of steel" would truly be a viable concept.
I would be interested to know that since the originol 721-722, the forerunners of the Remington 700 design, has there EVER been an instance of the bolt luggs actully failing on a Remington bolt??. I have never heard of one.
Back when PO Ackely did his "load to destruction" test on all of the old Military Rifles, did one ever lost the bolt luggs???
As you stated before, follow good, sound machine shop practice, go with a tried and true design, and you cannot go wrong.
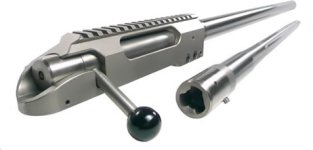
Insidentally, the only reason we use a cone bolt in a single shot Benchrest Rifle is so the rounds will feed easilly off of a ramp that is darned near in line with the chamber. It is not that practicle for other applications, and certainly not for a Rifle that must feed from amagazine.........jackie
 
Jackie,

I've removed the barrels from three 700s that were seriously overloaded, wrong powder being the cause. The three rings of steel contained the excessive pressures that caused the brass to flow into the undercuts in the bolt head. I will no longer install Sako extractors in 700s, having seen how well the stock Rem bolts function.
There was a poster on the boards a few years ago that had worked for Remington for 15-20 years. IIRC, he stated that they would ocassoionally fire a .30-'06 round, 220 gr. bullet, in a rifle that ALREADY had a 220 gr. bullet pushed into the barrel far enough to permit the complete round to chamber. The results that I remember him posting were that the barrel was usually blown out of the receiver. The bolts always held, even though there was considerable damage to the receiver.
I've seen a Swede Mauser that was overloaded (wrong powder, again) that blew the barrel out, splitting the receiver ring, blew the Leupold scope quite a distance away and did considerable damage to the hood and windshield when the rifle was fired from the hood of the pickup truck. The bolt stayed in the receiver.
I blew up a Japanese rifle, when I was 17 y.o., that my dad brought back from WWII. After considerable effort, I found a cartridge that would go in the gun. Tied it to a tree, long string, hid behind another tree and jerked the string. Fire flew from both ends, never did find the large disk that blew off of the back of the bolt and never got the bolt open.
I've been more careful about ammo selection, since.

Jay
 
Locking lugs ripped out of three bolts

.
I would be interested to know that since the originol 721-722, the forerunners of the Remington 700 design, has there EVER been an instance of the bolt luggs actully failing on a Remington bolt??. I have never heard of one.
Back when PO Ackely did his "load to destruction" test on all of the old Military Rifles, did one ever lost the bolt luggs???
As you stated before, follow good, sound machine shop practice, go with a tried and true design, and you cannot go wrong.
.jackie
,,,,,,,,,,,,,,,,,,,,


About 15? years ago a small rifle/action manufacturer that I knew at that time had three of his bolts returned by those whom bought his rifles that had a complete locking lugs failure.

Three locking lugs "fat" bolts and on every occasion all three lugs were not sheared off (as one would expect) but ripped out all the way to the firing pin hole in the boltface . The bolt heads on all three bolts looked like a three sided pyramid.

The reason for this to happen was, that the heat-treaters forgot to temper these bolts after they were quenched.

The bolt handles were just a flimsy 8x8mm sitting in a shallow hole silver soldered to the bolt body. Surpising, but they prevented the bolts from flying out from the actions.

Obviously these actions weren't test fired prior to being sold.
He also didn't have a HRC Testing equipment.

Leeroy I hope, that you now have a more clear picture about the possible danger of "heat-treating" a small quantity of steel. In this case the specifications were 4140/45HRC. What they turned up was 4140/57-58HRC.

I won't detail the circumstances, but if this heat-treatment mistake had happen with any of his actions that he've made earlier, there quiet possibly someone would have been seriously injured if not killed, as those earlier bolt handles would have no chance.

Shoot better
Peter
 
Last edited by a moderator:
4140 at 44HRC

I wonder why Remington chooses 34HRC. Or, at least the one I had checked was dead on 34.
45 seems a tad high for 4140.......jackie
 
4140/45hrc???

I wonder why Remington chooses 34HRC. Or, at least the one I had checked was dead on 34.
45 seems a tad high for 4140.......jackie
,,,,,,,,,,,,,

Jackie

One could say "it's hard" and personally I wouldn't go that high with 4140.

In this particular case the rifle/action maker was also using the same 4140/45HRC for his .50 Cal. bolts as well. The three lug "fat" bolt and the individual lug size was 12.7x12.7mm (0.5x 0.5") with a generous "cut off" on all three "matting" corners and one of the lugs was milled out to host a Sako type extractor. The bolts were a flat face designe with a very deep face recess.

The action bodies vere made of HT 4140 as supplied most likely 30-32HRC and had a "pressed in" locking insert 4140/45HRC. The .50 Cal. also had exactly the same 8x8mm bolt handle, that was silver soldered to the bolt body.

The actions were test fired with a standard pressure "factory/military" loaded over the counter ammo.

As far as I know and despite all of the designe/material short-comings there never was a problem with the .50 Cal. apart the bolt handles coming off quiet often.

Shoot better
Peter
 
Thanks

For all the great feed back here gentlemen..

I have been going over in my head (As i often do) the machining sequence.
Ie what machines to do what parts of the action, what setup to use etc..
I have most of it sorted out, just one thing has me stumped and i mentioned it in my original post... How to machine the receiver Lug closing helix?
I could always just machine them into the lugs on the bolt but this then decreases the bearing surface area.
The only way i can think of is either sinker EDM (which again i have to rely on my mate to do it for me) or mabe i could set it up in the lathe with a specialy shaped boring bar and set for a very course thread and slowly by hand cut the helix. With some unusual re-aranging of the change wheels on the colechester at work i can get threads up to 0.5 TPI.
Not easy to do this way though.
Any other Ideas??


Cheers

Leeroy
 
I was told by someone who apparently had done it was use a standard endmill in the milling machine (with a recessed shank and short DOC). Set-up at the proper angle and mill off the angle. I suppose a 45 degree cutter or something would allow you the clearance to do just that.
 
I have been going over in my head (As i often do) the machining sequence.
Ie what machines to do what parts of the action, what setup to use etc..
I have most of it sorted out, just one thing has me stumped and i mentioned it in my original post... How to machine the receiver Lug closing helix?
Leeroy

Leeroy,

Send me an email and I'll tell you how I did the 6 receiver blanks that I have.

Jay
1000yds at gmail dot com
 
Problems!

G'day all.

Well last night i finialy got arround to calling my mate who has access to the EDM machine and guess bloody what?? He dosn't work there anymore!! And his new work dosn't have an EDM machine!:( BUGGER!!

So today i started calling arround all the tool and die companies in Brisbane to get some quotes. Man was i in for a rude shock!!
The cheapest i could get the bore and lug raceways cut for was $725. :eek:
Even if i drilled and reamed the hole and just had the lug raceways cut was $560.
At these prices the "Remington" based design is a no go.:( Looking at our slotting machine at work i don't think i can make a tool long and slender enough to pass through the bore and still be rigid enough to cut on size without chattering all over the place. Broaching too is out as i would have to get some new broaches and modify them to do the job. Again way to expencive..:(

So given that i will look now into the "Fat Bolt" concept, negating the need to cut raceways at all.
I have never layed my hands on such an action so this weekend i'll go down the the LGS and have a play with a few guns.

I will probably go for a 3 lug design as the lug abutments can be thiner than for 2 lugs making for a smaller dia bolt.
This also means a 100% build. Ie no cheating by buying off the shelf parts..:(
At least i can call it 100% my own design.:D

Cheers
Leeroy
 
Mate

Send me your email address I'll send you some pic's of my 3 lug BAT.
Jim;)
 
Several years ago there was an article in PS, decribing how to cut the raceways on a shaper. I managed to get a reprint of said article, but it is at home and I am currently working overseas, perhaps someone else has a copy they could scan? Basicaly it was a rod (an old barrel),that had a spring loaded cutter protruding, about halfway down it, and at the free end was a threaded adjuster that pushed the cutter out a little via a wedge every time you turned it, the cutter too had an opposing wedge, it cut on the backstroke of the shaper to keep the rod straight, and the blade was spring loaded to tuck back inside the rod not to dull the cutter. I hope this all makes sense, from memory I think it would take 45 minutes to cut 1 raceway.
Something for you to think about before you go to the full bolt option. :D

Cheers
Kev
 
works like a rifling head and works well in chrome moly at 35 Rc or less and same for 15-5 or 17-4

not so good in 15-5 or 17-4 at 40 Rc

In fact the units are designed like rifling heads and can be made to automatically adjust themselves on each stroke
 
Leeroy-there may be a hope

G'day all.


The cheapest i could get the bore and lug raceways cut for was $725. :eek:
Even if i drilled and reamed the hole and just had the lug raceways cut was $560.

So given that i will look now into the "Fat Bolt" concept, negating the need to cut raceways at all.
I will probably go for a 3 lug design as the lug abutments can be thiner than for 2 lugs making for a smaller dia bolt.
This also means a 100% build.
At least i can call it 100% my own design.:D

Cheers
Leeroy
,,,,,,,,,,,,,,,,,,,,,


Leeroy

Personally if I was to go to all the bother of making an action, it wouldn't be a copy of a Remington. It would be 100% build with all the features that I like in a number of other actions.

2 vs. 3 lug "fat" bolt has no difference on the hight of the lugs. A maximum contact surface area of a "bayonet" turn lock can and always is a 1/2 of whatever the SD/LD diameter of the lugs is. A "fat" bolt of the same SD/LD diameter lugs will have the same contact area regardless, 2-3-4 makes no difference. As a matter of fact, the two lug bolt has only two slanted corners instead of three or four.

Check your PM for a help with your raceways. Whereabouts of $150 vs. $560 it's worth the call.

Shoot better
Peter
 
Last edited by a moderator:
The 7" shaper with vice that I bought from e-bay cost me just at 700.00. I found this to be the best size for the work at hand.
 
Design..

Ok Gentlemen after much reading/studying pictures over at Homegunsmith.com and having a "Play" with a few rifles at the LGS, i have decided on a basic design.

The action will be a 3 lug "Fat Bolt" design.
Receiver will be a flat bottom rectangular shape with built in scope rails.
Something like the attached picture, but without the switch barrel design.
Still unsure about being a repeater or a single shot, i will have to go and see what magazine/bottom metal is avaliable as i realy don't want to make these as well.

Most machining work will be done in the CNC Mill, including drilling and reaming the bolt raceway. Barrel threads done with threadmilling process.
Depending on how accurate this comes out i migh mount in a spider in the lathe and then "True" the action in the usual way.

Material will be EN26 heat treated then machined.

Comments?

Cheers
Leeroy
 

Attachments

  • fatbolt4.jpg
    fatbolt4.jpg
    13 KB · Views: 724
A good choice

Leeroy

It looks very good and if you make one like that, without the "barrel change" and without a magazine it'll be an action that you can call 100% own designe.

I hope that you"ll also incorporate a bolt with nose for extra safety.

So far, well done.

Shoot better
Peter
 
Last edited by a moderator:
Pre-drill a "loading" platform

Leeroy

One thing to remember is; if you'r going for a designe without a magazine you will need to have a "slanted loading platform" (ala Wichita) to assure smooth trouble free feed, and especially so if you'r having a "fat bolt".

The best approach would be to pre-drill this "slanted hole" on a vertical drill or a milling machine and then to drill and bore from the other side on lathe. Before heat-treating.

Shoot better
Peter
 
Last edited by a moderator:
I have been unable to find other threads with details of peoples custom receiver's/builds. Could someone add them here for quick reference.
thanks
 
Back
Top