Another Bullet Making Thread (lots of photos & video)

Well, you just saved me some time Wilbur. Let me first say some old Precision Shooting articles on bullet swaging hinted that core weights are more uniform by doubling. But last night I ran another 100 single-pressed and they're dead on. Thanks Wilbur.

-Lee
www.singleactions.com
 
Well, you just saved me some time Wilbur. Let me first say some old Precision Shooting articles on bullet swaging hinted that core weights are more uniform by doubling. But last night I ran another 100 single-pressed and they're dead on. Thanks Wilbur.

-Lee
www.singleactions.com

Especially, the Lee presses, which do not stroke, "over top-dead-center", but rather stop just short of TDC are like that - yes they are! :eek::cool: RG
 
Go to the thrift store and look for a used ice cream freezer (cheap) for lubing the jackets. DO NOT put the jackets in the "can" but rather a glass jar - in the can. Stuff some rags in there to keep the jar from rattling around. Set it to a 45 degree angle and let it rip while you watch a ballgame or something. The jackets need some room to circulate so don't fill the jar too full. Try to find a freezer and jar that will lube a thousand. Others may have alternative suggestions but this is a pretty easy way to go and it works well.

I lost a thousand jackets when I thought I would just skip the glass jar and use the freezer can. Don't know why I did that! They did look kinda pretty but I declined from putting them in those expensive dies not knowing what would happen.
 
L̶o̶o̶k̶s̶ ̶l̶i̶k̶e̶ ̶f̶i̶r̶e̶f̶o̶x̶ ̶i̶s̶ ̶t̶h̶e̶ ̶p̶r̶o̶b̶l̶e̶m̶. Works on IE...........Thanks.

finally found problem. "Please try clearing your cache." found on the photo bucket site.
back to making bullets......
 
Last edited:
Step 5 - Core Degreasing

The cores must be thoroughly degreased before jacket seating. I use Coleman camp fuel to do this and with good results. 1,000 cores are placed in a mason jar and filled with the solvent. After 2 minutes of gently rolling by hand, the wash is drained through the punctured lid.


Fuel is poured to the top of the core line:


Draining.


After this is done three times the cores are placed in a strainer. Clean Coleman is poured over them for their final rinse.


They’re then laid out to dry.


Some take this a step further and etch the cores. This roughens the surface a bit and in theory gives better jacket adhesion. After talking to a few folks, including Ulrich, I’m not convinced this does anything to improve accuracy. George recommended I just degrease them and move right to seating. Maybe in time I’ll etch and see if it makes a difference on paper. The steps involved go as follows:

Get a colander and some tri-sodium phosphate (TSP). Put the colander in a large metal pot and pour the cores into it. Make sure the colander has feet that raise it an inch or so off the bottom of the pot. Add a half gallon of water and one tablespoon of TSP and place it on a stove. Bring the water to a boil and allow it to cook for ten minutes. Then rinse them in a strainer with hot running water. When dry they’ll be dull in color and look frosted.


-Lee
www.singleactions.com
 
Last edited:
Good stuff, Lee. In the 'For What It's Worth Dept.', I did the final clean of my cores by boiling them in water & Calgon dish washer soap (powdered).

With adequate core seating pressure and the correct core seating punch size, I could tell no difference between etched cores all the way to lightly lubed (yes, lubed ;)) cores. -Al
 
Last edited:
These are not of Lee. Are they typical of how these operations are done? Comments? I believe that the dies are by Niemi. (Yes, they are out of order.)
https://www.youtube.com/watch?v=5IgZF1OTmaw
https://www.youtube.com/watch?v=uQmsQ5J5EgU
https://www.youtube.com/watch?v=P-O_sYuaoH8
https://www.youtube.com/watch?v=sl2M39AI-ig
https://www.youtube.com/watch?v=rFFn4wJU_Ww

Boyd in that first video, he is using his core dropping tray to place the sqeekiy clean cores in the jackets, but then uses his fingers to help many to drop.

I was told never to handle a core with your fingers, or anything else that might leave a film after cleaning. But then, maybe that was being too anal about the whole thing.
 
Step 6 - Lubing the Jackets

The jackets are first cleaned with acetone. For the record, I’m using Hines Tactical 0.820”s from Bart Sauter. They’re very high quality with respect to concentricity and composition. I’m told the gilding metal’s properties are as critical, if not more important than wall uniformity. Of course the latter is still needed for top precision. To date I’ve been shooting Bart’s 68 gr Ultra FB and they’re killer. No surprise I’m buying jackets from him for my home spun 67’s.

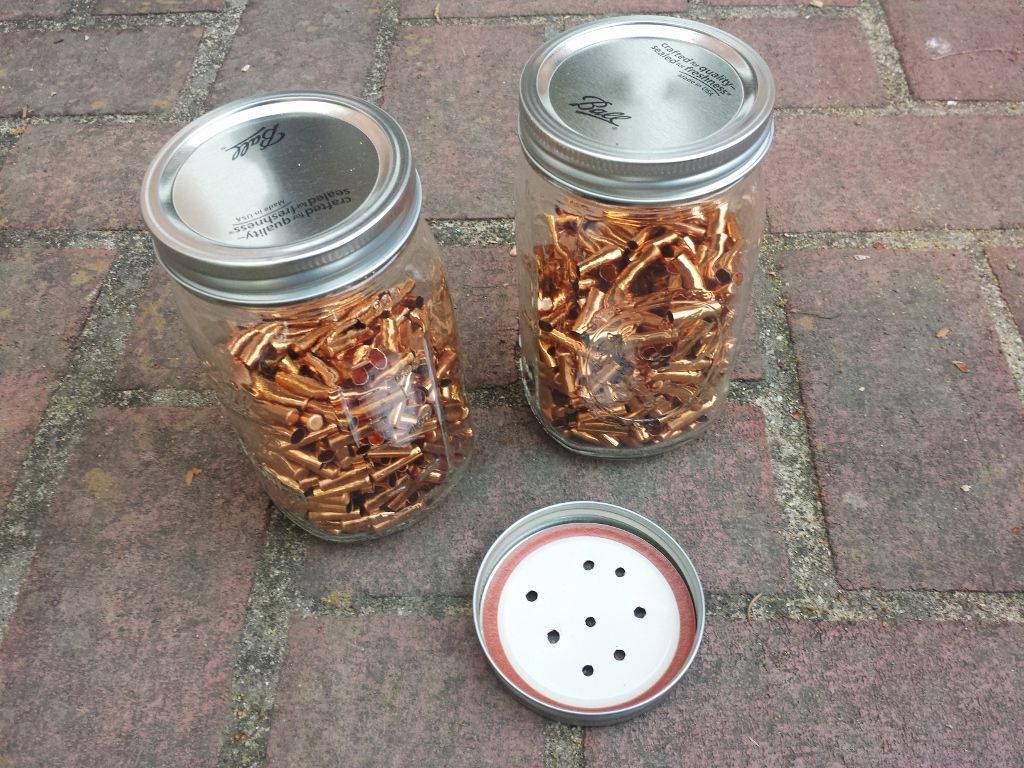
I decided to run my bullets in batches of 500. Two jars are filled with that quantity and acetone is poured to the top of the jacket line. The jar is gently rolled by hand for two minutes and drained. All 1,000 are spread out to dry.


Prior to core seating the jackets are lubed. Many concoctions will do such as anhydrous lanolin mixed with vasoline, neatsfoot oil, or castor oil. A 5:1 ratio seems common. However George Ulrich prefers straight anhyrdrous lanolin and he sent me a few ounces to try.


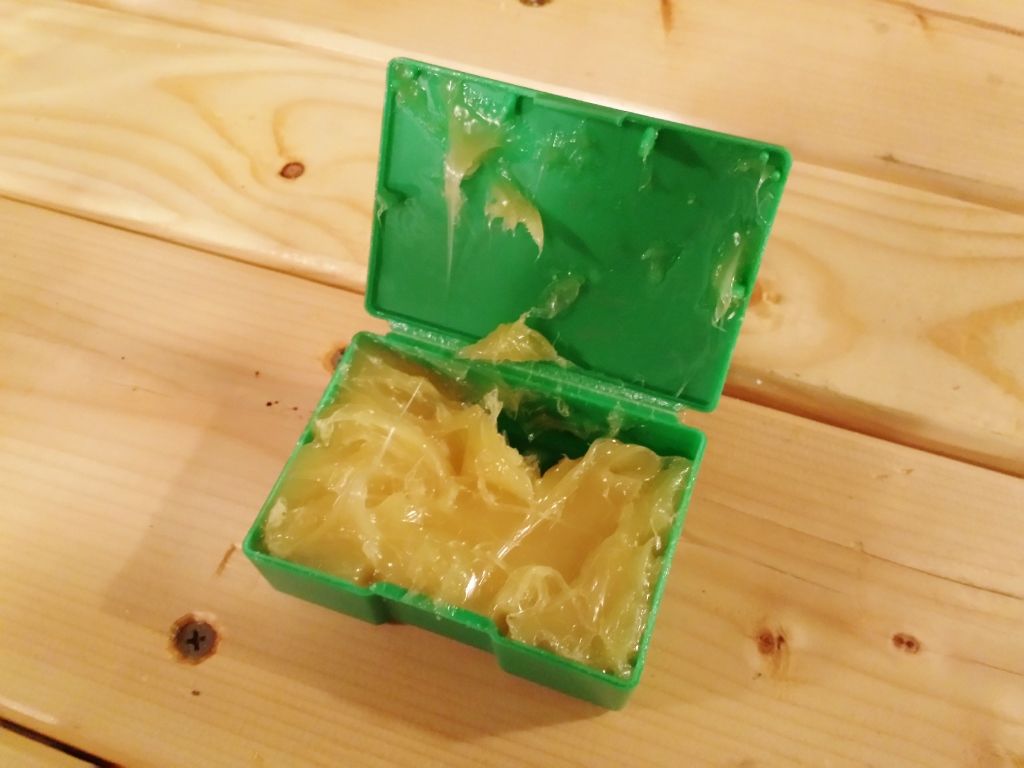
If you’re wondering about the source of lanolin it’s natural. Sebaceous glands of wool-bearing animals like sheep secrete it.

The lanolin is carefully weighed and smeared on the walls of a mason jar. Consistency is a must here. Not only do you want to use a minimal amount for the job, the weights should be identical batch-to-batch. First we tare the electronic scale with a piece of wax paper.


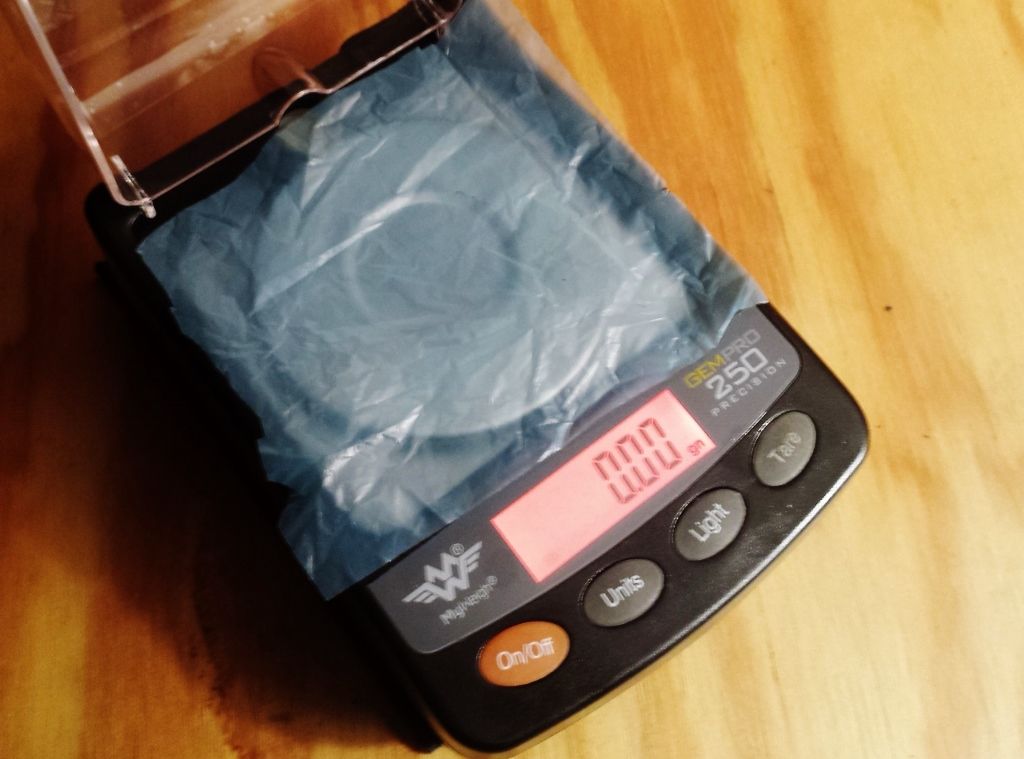
A small, and I repeat small dab of lanolin is added with a knife. I’m aiming for 2.0 grs so this is heavy by a ½ grain.


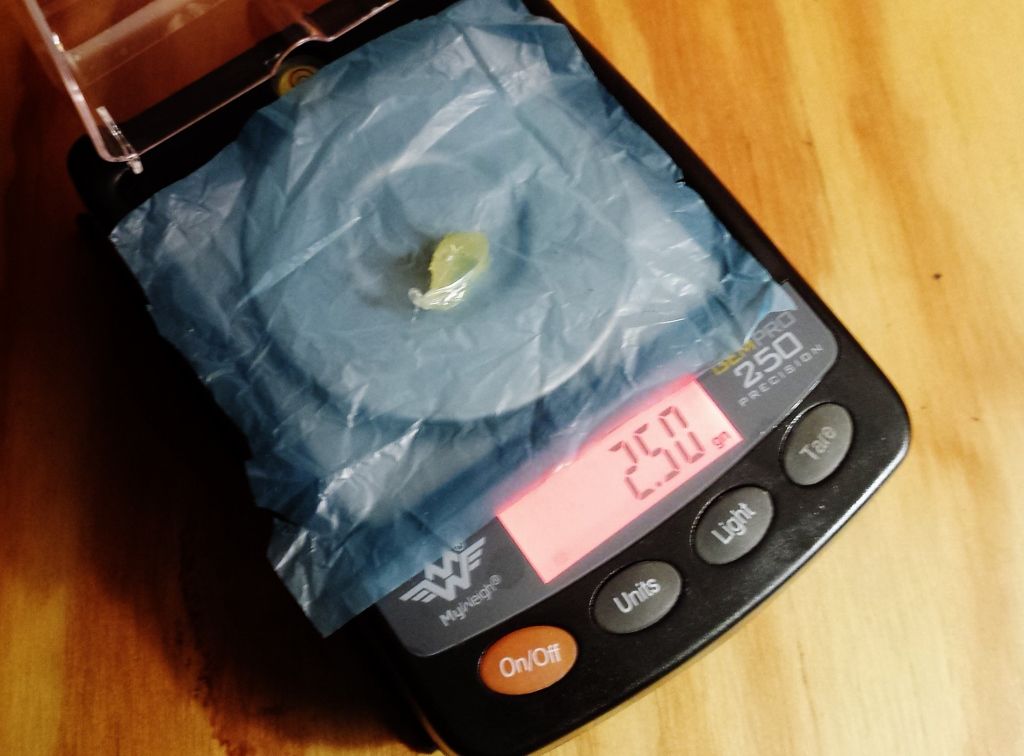
With a knife I’ll cut a little off the top until I hit 2.0 grs. The lanolin is then smeared inside the jar by hand. Be certain there are no visible globs on the glass. A jacket’s edge could grab this solid mass and get inside. We only want it on the outside of the jacket. Once applied, the jar looks hazy with no signs of yellow. 500 jackets are poured into the two and separately placed in my rock tumbler.


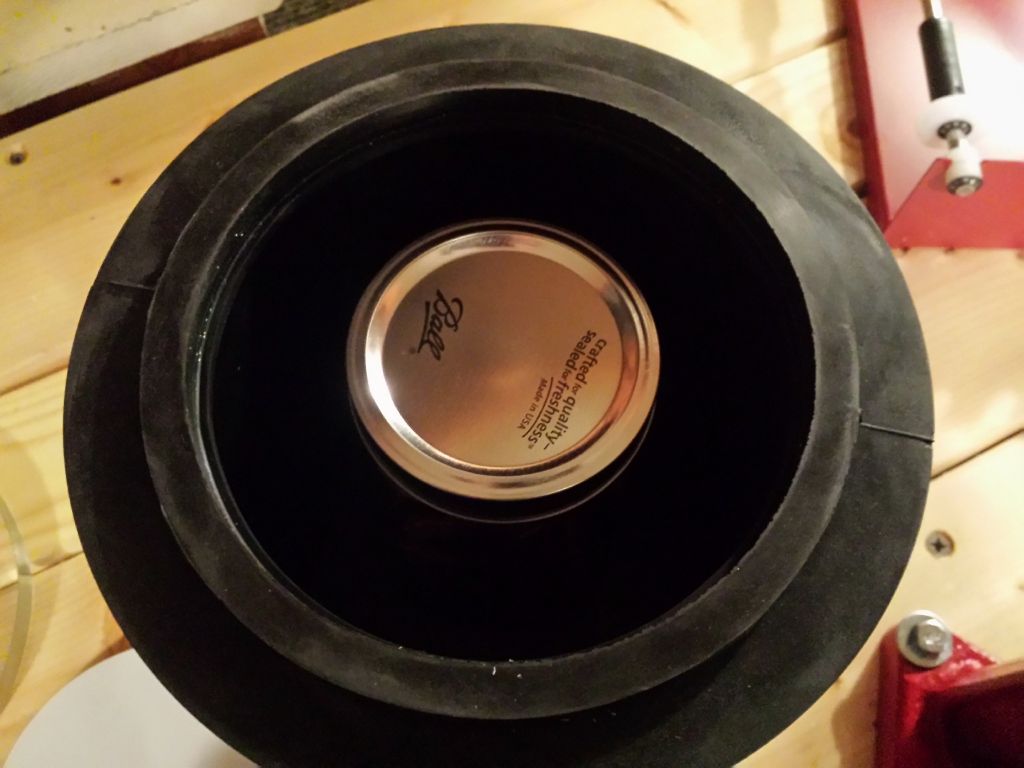
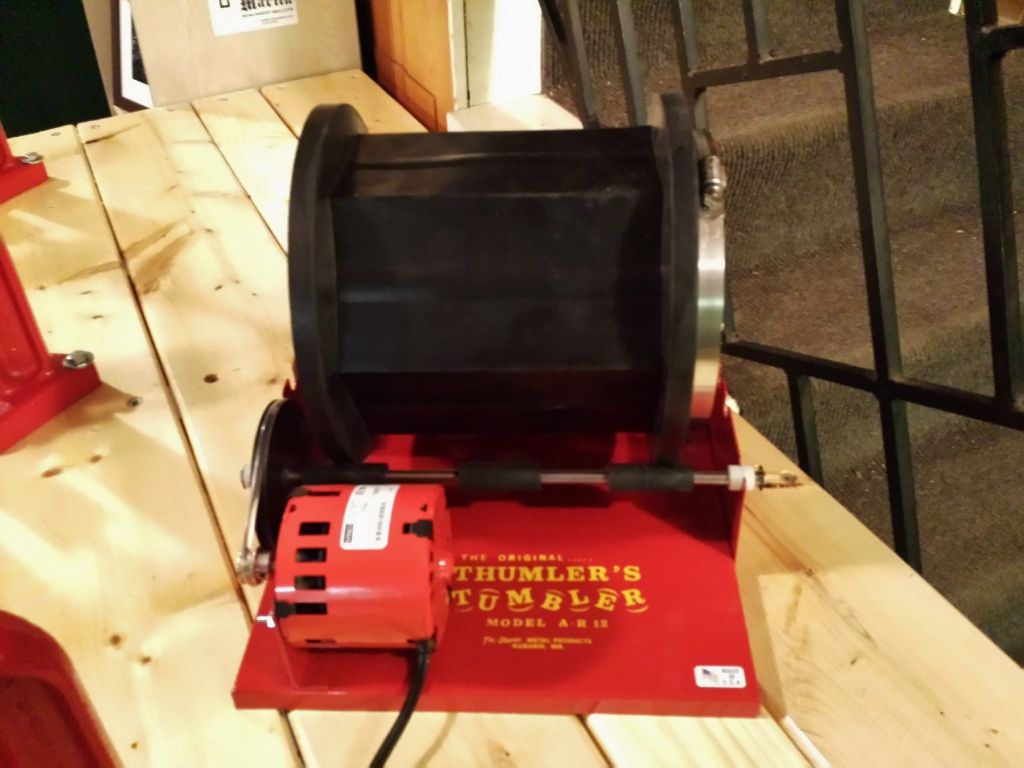
The jars are tumbled for 30 minutes a piece. Here’s some video of that step:


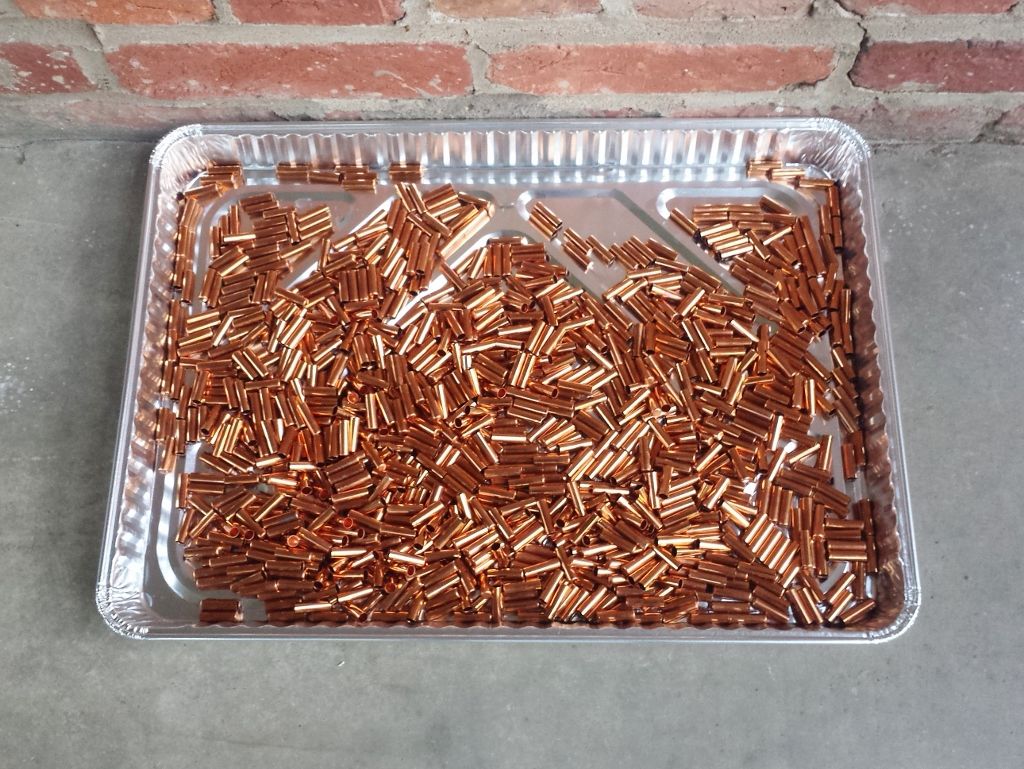
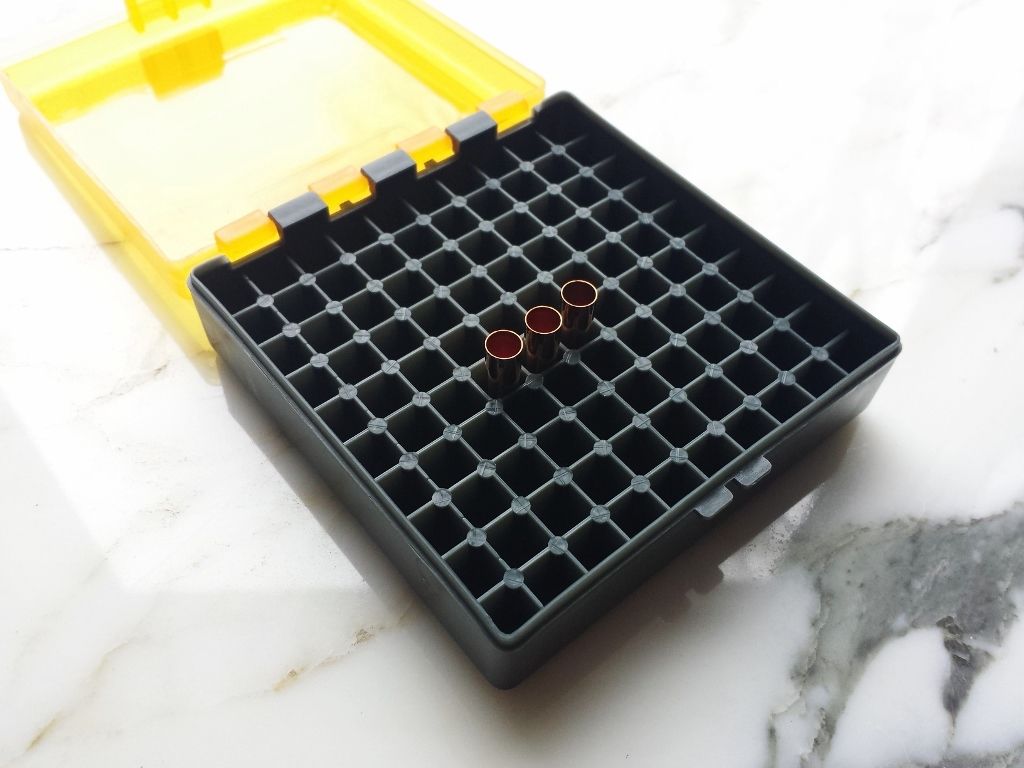
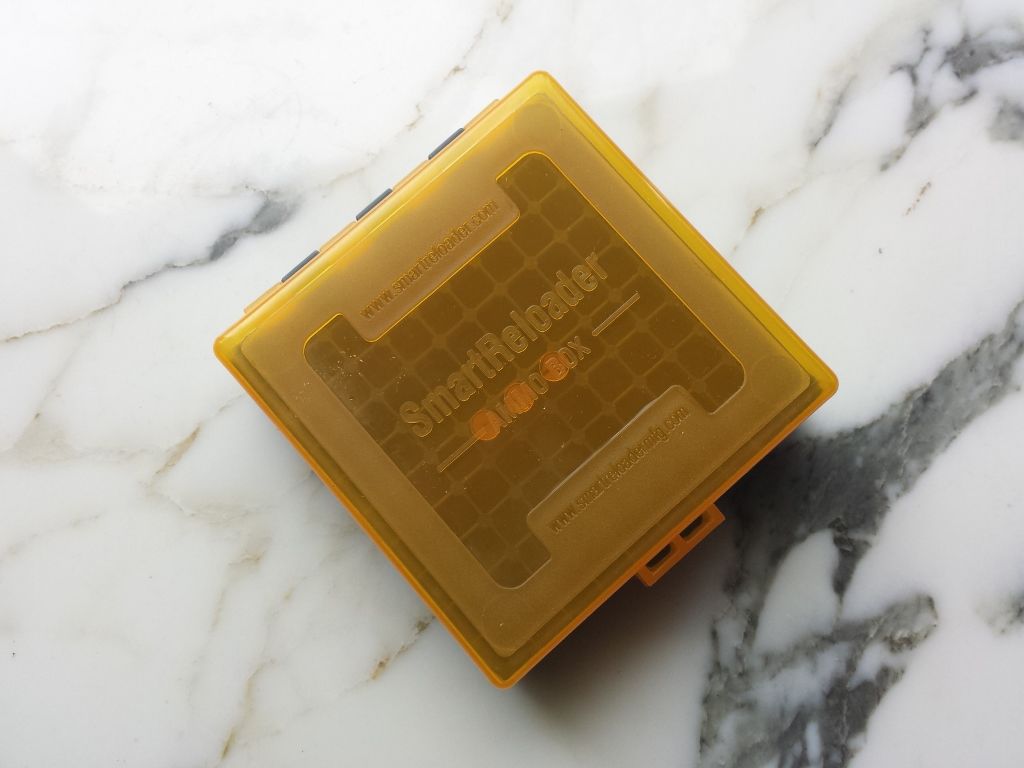
Using plastic tweezers I place them in my trays. Dedicated bullet boards are faster and save a lot of time when dropping cores. I almost made one from Delrin on my Bridgeport but these .22 ammo boxes work well. Each holds 100 and they’re only $35 for ten.


-Lee
www.singleactions.com
 
Last edited:
Step 7 - Core Seating

With a different set of plastic tweezers I drop the cores into the jackets one at a time. Be sure not to use the same set that pulled the jackets from the jars. Those likely still have residual lube on them. We don’t want any oil to get on the cores. That’s why I don’t insert these by hand.

1,000 jackets ready to get cores


Left – blank jackets. Right – jackets with cores dropped in.


We’re now ready to core seat. This is probably the most vital step in making precision bullets. First the punch must be matched to the jacket. The optimal size is 0.0005” under the inner diameter of the jacket to the final lead line. Mine took a 0.2120” punch.

Core seating accomplishes a few things. One it firmly attaches the lead core to the copper jacket. This is done through ram pressure. And we want a hair line of bleed around the punch. It’s tough to get a picture of this but under magnification you’ll see a tiny amount raised off the top of the core. The second thing at play is the principle of expanding up. The cored jacket is undersized until seated. This die swells the outer diameter to the final o.d. As the jacket widens it shrinks in length by a few thousandths. Ulrich told me how to adjust the die to get there and even sent samples. The die is backed-out and then screwed down until it contacts the jacket. Now the jacket won’t transfer off the punch until it’s expanded. So keep going down until it stays in the die on upstroke. George said to shorten it by around 0.005” and match the diameter of his cored samples. My jackets measure 0.820” in length so I tinkered with the die until I got 0.815”. If you go too far you’ll pop the cup. I’ve yet to do this but I’m told they make a loud crack when ruptured. At 0.815” my bases mic 0.2432”. Dead on to the ones George provided. The die is locked.

The cored jacket is placed on the punch and processed.


The cored jacket as it ejects.


Just like core swaging, stroke pressure and dwell time must be the same throughout. Here’s a short video of me seating cores.


The cored jackets are left to sit for 48 hours before pointing-up.

-Lee
www.singleactions.com
 
Step 8 - Point Forming

I spoke with George Ulrich last week and he told me to cut down on my lube. Going forward I’ll use 0.5 grs per jar for jacket lubing. The cores will then be seated, the jar cleaned with acetone, and another 0.5 grs applied to lube the cored jackets. Since I still had enough lanolin on the jacket at 2.0 grs, I didn’t re-lube after core seating. Instead I went right to point forming. Here are those steps.

The cored jacket is placed on the punch and the press is actuated.


Some video of the point-up process:


Note how careful I am in guiding the thin jacket lip into the die. The final bullets are then measured for:

1) Weight – these by design land at 67.1 grs. I must’ve done good on core swaging because they vary by less than 0.1 grs over a wide sample population
2) Base diameter. All of them mic 0.2433”
3) Base-to-ogive. These are exactly 0.966” with no variation across those tested.


Here are the components involved in making these 8.5 ogive 67 grain 6mm’s. Left to right – cut core, swaged core, empty jacket, core seated jacket, and the formed bullet.


One of the neatest features of a Ulrich bullet is the heal. George grinds a slight radius into the core seating and point-up punches. The result is a straight base with no discernable pressure ring.


My boxed bullets. 500 count on the left, 1,000 count on the right.


This Saturday we’ll see how they fly.

-Lee
www.singleactions.com
 
Jackets seem to be a little different now than they were 10 years ago. I recall not being able to control what the base of the bullets I made looked like. I had some jackets that made an absolutely flat base and others that had a bit of radius. Thought I was doing something wrong but finally realized there was a difference in the jacket. I busted a few jackets and they still had a radius....finally realized I couldn't do anything about it. They shot just as well as the completely flat bullets.

Concerning jacket seating pressure....I've got a question. I determined that if the bullet came off the punch every time, the bullet was as good as if I increased the pressure to the maximum the jacket would allow. Anybody know differently? I seem to remember folks thinking a little jacket stretch was a good thing but I never could prove it.

Good lookin' bullets Lee!! I'm certain they'll shoot just fine!!! Great writeup as well - thanks a million for doing this!!!!
 
Lee
Thank you for your time here. I have never seen a single bullet being made and I really enjoyed this. I hope your bullets shoot well. Im not the betting type, but if I were, my money would be on that they will shoot great!!! I cant wait to see your results. Well done, and congratulations!! Lee Gardner
 
I also would like to thank you for posting this series on bullet making. I have a question. The device on the calipers that looks like it measures the same as the Hornaday tool, is that one you made or does someone make and sell them?
 
Back
Top