Die project

Al Nyhus

"It'll never work!"
This is a die project I just finished for my Browning B78 chambered in 6MM Jet...which is basically a .065 short 243 Ackley 40 degree case based on the rimmed 307 Winchester.

307W (lt)/ fireformed 6MM Jet (center)/243W Ackley 40 degree (rt)

gOyunl1l.jpg


Since this is a falling block action and doesn't have the primary camming extraction advantage that a bolt gun does, I wanted to size it pretty aggressively.

Started with a non-bushing Redding 243W Ackley full length die:

n6kx6Eal.jpg


Shortened it .065, shortened the knurled upper area to make it better suited to an internal thread plug to hold the decapping pin and act as an upper travel limiter for the bushing, then polished the O.D. a bit. In the lathe, I indicated it on a .266 pin gauge that perfectly fit the original .266 diameter of the dies neck opening:

kEqQjuCl.jpg


Then went in and opened the neck diameter with a .2815 carbide chucking reamer.

I6QJL3ml.jpg


Bored the top to the level I wanted and threaded for the decapping plug assy. Not a great picture but you can see the bushing down in there:

cFRKb14l.jpg


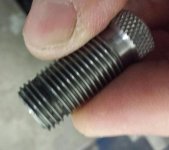
For a decapping stem/bushing retainer plug, I scavenged an old set of Herters dies. Rather than a lock nut, a thread relief cut stops the plug about .006-.008 above the bushing. Grainy pic but you get the idea:

6LcsF8sl.jpg


Finished product:

PuNPD4tl.jpg


It sizes fired cases like "Johnny be jiggered!" (Col. Sam Clayton in 'The Searchers') and now there's the ability to juggle neck bushings to see what it likes.

All in all, a fun project!

xUKDgAal.jpg
 
Last edited:
Die alterations

Nicely done!

I've got a couple of similar projects planned.

1- bore 6.5 Rem Mag die to accept bushings, thread for bushing retainer

2- shorten 358 Winchester die by .365" and ream neck to specific diameter

Hoping they turn out 1/2 as good as yours!
 
I had Kelbly's use the AI chambering reamer to open up a Redding sliding sleeve die that uses neck bushings.
The sleeve is not hardened and easy to alter.
 
Have a question. How does cutting a relief groove control the plug stopping .006/.008 above the bushing with out some sort of a locking nut?
Myself I just don't understand how it works.:confused:

Thanks Chet


thread relief cut.jpg
 
What's that BIG thing sticking out the side - a speed adjust lever?!!?:p As usual, well done, Al. ;)
I'm with Chet - what makes it stop?!? :confused: RG
 
What's that BIG thing sticking out the side - a speed adjust lever?!!?:p As usual, well done, Al. ;) I'm with Chet - what makes it stop?!? :confused: RG

The long set screw is kinda' like a Kenworth shifter...makes it easier to adjust! ;)

You and Chet are correct in that a true interrupted thread wouldn't stop the plug. I cut a relief in the threads and flattened the bottom of the thread above the relieved thread to limit the travel. Honestly, it was a lot of futzing around when simply shortening the top of the die would have been easier. ;) -Al
 
I recently turned a Whidden FL bushing die into a body die. I had all sorts of trouble turning it. I’d done the same with a different die before and it easily cut and it still wouldn’t look as nicely finished as yours!

What cutters did you use?
 
I recently turned a Whidden FL bushing die into a body die. I had all sorts of trouble turning it. I’d done the same with a different die before and it easily cut and it still wouldn’t look as nicely finished as yours! What cutters did you use?

I'm not very savvy on cutting inserts and cutting tooling in general....pretty much stumble my way along using whatever seems to give a decent finish. I used a carbide Kennametal insert to cut through the outer hardened skin and then thought a change to a HSS insert would be the plan. But the carbide cut so nicely that I just kept using it.

I think I'll face off the top of the die a bit more and add a lock ring to experiment with a bit of unsized neck at the bottom to locate the case in the chamber. -Al
 
I recently turned a Whidden FL bushing die into a body die. I had all sorts of trouble turning it. I’d done the same with a different die before and it easily cut and it still wouldn’t look as nicely finished as yours!

What cutters did you use?

Why bother cutting the die? All you have to do is to leave out the bushing.
 
This is a 6.5 SS. It’s the seventh chamber I’ve made and none of the other brass will fit unless the base is sized more. Fired brass from this chamber works fine. I’m guessing g it’s the straightest chamber I’ve ever cut.
 
Here's a couple of solutions;

This is a 6.5 SS. It’s the seventh chamber I’ve made and none of the other brass will fit unless the base is sized more. Fired brass from this chamber works fine. I’m guessing g it’s the straightest chamber I’ve ever cut.

Open the ass of that chamber up a little or take a couple of thou off the butts of the cases that won't fit. A couple of winters ago a poster put up a picture on here of a cutter he had made to trim the click out of his cases. I went through mine and draw filed .002" off the butts of the troublesome ones I had, Problem solved. Easier to sand .002" out of the back of your chamber though. This is a common practice.

Pete
 
Sanding the end of the chamber is actually what I did. I took off what I thought was enough, tested and took off some more. It made it better but I'm just going to use the brass from this chamber. I have 200 pieces that will only fit if I use the body die. Then, they still 'click' while those formed in this chamber have no click after the first sizing with the normal sizing die. Second or third firing could change that. At that point, I'll remove a little more from the chamber.

I'd love to see the cutter someone made.
 
Sounds like a perfect candidate for what is sometimes referred to as a 'ring' die. Using a small base die for whatever cartridge family you're working with and opening up the area above the base works well. Here's one of mine that's been modified to do just that. It started out as a 308W f.l. small base die.

The top of the die has been opened up with a small boring bar:

G9tyR1xl.jpg


From the bottom, you can see where the bored out area stops. On this die, it aggressively sizes the last .375 of the case:

DCjRN2Ll.jpg


I've not used a cutter on the back end of cases. Sanding the back ends with crocus cloth while the case is rotating has been known to happen, here.....:eek: :D -Al
 
Back
Top