Dial Test Indicator Flaw

Z

Zirok

Guest
Hi

I am doing a project using dial test indicator.


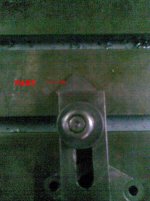
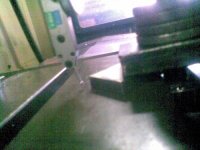
As seen in Image 1, I have clamped the part in such a position that it is 45 degrees to X & Y axis.

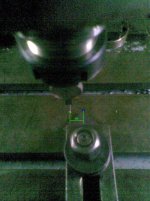
Now as shown in Image 2, I go 20 mm offset from the zero point (Zero Point is shown in blue color) & move in Y axis until reading is shown on dial.

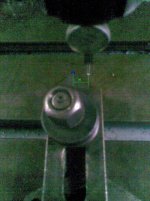
On similar grounds, I go to 20 mm offset from zero point in opposite direction (see image 3 ) & move in Y axis until reading is shown.

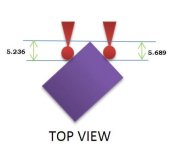
The machine movement in Y axis from Zero Point should be same in both the conditions as mentioned above. But there is variation of 0.453 mm in both the positions (Refer Image 4).


In short, the dial test indicator needs feeds of different values to create the same reading on dial.
We have ensured that the dial clamped is perfectly parallel to Y axis, so there is no issue of contact Point Error.
Can we conclude the Dial as A unbalanced Dial ?
I think this problem has never been noticed by anybody in history till date


How can this happen & what should be the error & how to compensate that error. ??


It is definitely not a Co-Sine Error (Refer Image 5). It is clearly visible that the angle of lever arm is almost 90 degree to the part.


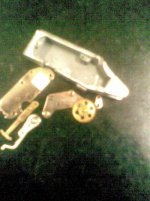
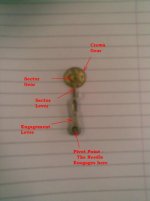
To know more, I had a broken Dial Test Indicator & then disassembled all the stuff to know actually how the dial mechanism works. ( Refer Image Internal Assembly )
As you can see In Image 6, how the mechanism works. It doesn’t seem to be a unbalanced dial. It is a simple mechanism & logically there should be no error.


Need help
 

Attachments

  • 1.jpg
    1.jpg
    64.1 KB · Views: 404
  • 2.jpg
    2.jpg
    63.9 KB · Views: 378
  • 3.jpg
    3.jpg
    63.3 KB · Views: 339
  • 4.jpg
    4.jpg
    12.9 KB · Views: 307
  • 5.jpg
    5.jpg
    30.5 KB · Views: 331
2 attachments were missing from previous post.

Zirok
 

Attachments

  • Internal Assembly.jpg
    Internal Assembly.jpg
    64.5 KB · Views: 312
  • 6.jpg
    6.jpg
    21.5 KB · Views: 289
You're applying a load to the Stylus, that is not perpedicular to the stylus. Is there a specific reason for that? I am trying to learn here. I never do that. I always try to get as square to the piece as possible before taking a reading.

Paul
 
The ball end of your probe may not be concentric with the center of the probe shaft. That would mean you are touching off on radius A, shifting down one side to radius B, 45 deg from the first, and then moving down the other side to radius C, 90 degrees from B. You could get substantial error that way. Typically you want to make sure you are contacting the probe at the same point on the ball.

Second, using a dial test indicator over its full travel is not usually (depending on the quality of the instrument) the most accurate way to use it.

Third, your indicator may be trashed.

The part may not be square, or the sides may not be parallel to the table.

Your DRO may be off--slop in the scales.

The head could be knocked out of tram. That wouldn't explain the whole error but it could be a part.

Or a combination of all, including things I haven't thought of!

Neat experiment though.
 
Hi All

pbike - I know that a DTI is used to align a part. You know the caste of hoobyists. They try to do something new against the laws of gravity. :D


EssentialTremor - The probe lever arm is concentric to the probe shaft as it is firmly clamped into the pivot hinge.
The swivelling movement of arm is perpendicular to the dial screen. I aligned the rear side of dial so that i made the lever arm parallel to machine axis. So, it is ensured that the same point touches on both the sides.
A provision is there in a machining centre called as G68. I rotated the coordinate system & aligned the part to 45 degrees.:) to ensure that my part is aligned by 45 degrees to machine axis.

Thanks
 
Hmm. A wise man once told me that when you start breaking laws of geometry, you need to rethink your setup.

If you're doing this on a VMC, then rigidity isn't a problem. I'm going to throw my hat in the "dial indicators aren't designed to be used like that" ring.
 
Amazed!

I am still reeling from the fact that you actually took the indicator apart and re-assembled it and it still works! You da man! In my career, I've never seen anyone ever accomplice such a feat!
 
My thought would be that you are in error about the part being symmetrically aligned. If it is not, it would explain everything.
 
Flawed indicator test

My instinct tells me that loading the stylus at an angle as your test seems to do is almost certain to induce error. If everything is set up as you intended and you were performing this test with a Renishaw probe or similar instrument, your reading should be "about" the same on either side. If you performed this test on a coordinate measuring machine, the results would be more accurate. DTIs are not happy with side loads on the stylus.

Scott Roeder
 
You cannot use an indicator in that manner. Every indicator of that type will produce that type of error. The ball of the stylus is not on center line. A simple test is to drill a hole .005 over the size of the ball on the stylus and try to indicate the hole in. You will find that the ball of the stylus will be off center on the axis that is 90 degrees from the pivot point.
 
Joel Has it correct - - -You cannot use an indicator in that manner. Every indicator of that type will produce that type of error. The ball of the stylus is not on center line. A simple test is to drill a hole .005 over the size of the ball on the stylus and try to indicate the hole in (be careful you don't break the indicator doing that). You will find that the ball of the stylus will be off center on the axis that is 90 degrees from the pivot point.

If the picture is any indication of the part, man that is small . . wow !! The side of the ball will not indicate an angle, the load on it is sideways ! You should redo the set up and or put it on a tooling plate and give yourself something to indicate from or to. I used to use a tooling glue to attach things with and make the set up so that I could indicate or rotate it to give me the point of origin or tool to. You are trying to indicate angles with a off set indicator that will never give you a correct reading . . . never !! The indicator balls are not on the CL of the indicator . . they are designed to indicate on the CL of the ball . . . And the indicator and spindle will not repeat to the same point of the angle, you will never know where you are in the rotation of the spindle . . . don't know what else to tell you !!
 
Tooling Plate . .

Since I posted the last response - I have given this some thought and a pencil . . I don't have the neat little cad program on my computer.

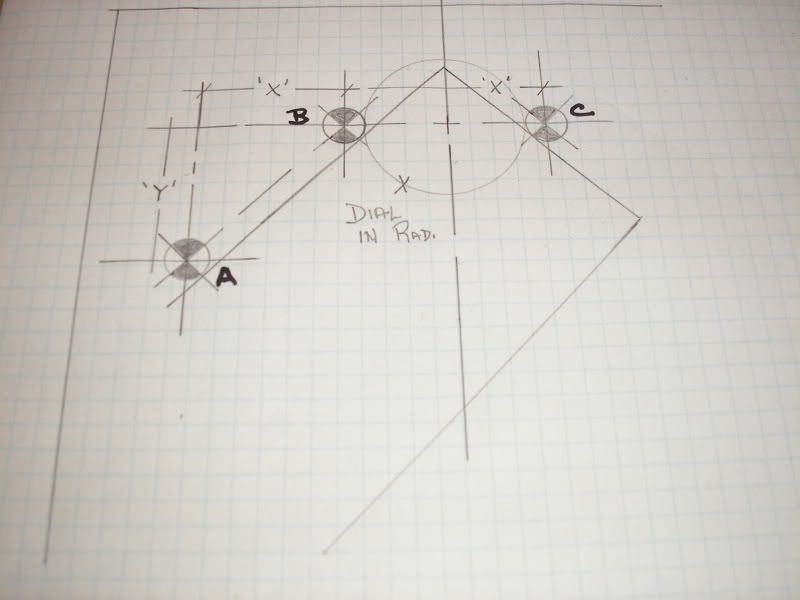
003.jpg


Since the part is exactly 45* it becomes easy to do a small tooling plate. Square a small piece of 1/2" or better Alum. plate and then drill 3 holes in it at the angles shown. "A" & "B" will be equal distances apart in "Y" & "X" and the holes can be any size, you can remove them after the tooling plate is clamped to the table (preferred way to do it). Holes "B" & "C" the other "X" can be any distance that is not greater than the tip of the part, I would suggest making them an even dimension. Put the tooling plate on the table and dial it in and clamp the part to it, then dial in the "B" pin and move in "X" 1/2 the dimension of the pin and 1/2 the distance to "C" and you should be in the middle of the tip . . and if the pins are still in place you can swing the indicator and double check the "0" between them as center.

Now you have the part clamped on a piece of material that if it should move will not damage the mill table, ( I would have gotten fired for clamping anything to a table) and you can add other tooling holes to hold the back side in place if needed . . not shown. When needed for something like that I have used a thick piece of tooling plate and drilled the tooling holes all the way through it, cut pins or used small dowel pins and put a small piece of spring under it, so the clamp would push the pin down, but leave the integrity of the pin holding the part.

Just a suggestion if you have to be precise on that tip dimension . . :rolleyes: Good luck . . . .
 
setup problem :)

IMO the test is flawed because of setup errors as well as measuring error.

If one were to set a workpiece in place and machine the two converging 45* angles and manually establish the crossover point (tip) one could then split from this established centerline and get readings within .002-.003

I'm guessing :)


Depending of course on the sideplay differences in the support of the (misused) stylus. IMO indicators should be used as close as possible to 90* to surface to eliminate angular deflection error. I can't imagine getting a good reading from the side, let alone switching sides!

al
 
I thank everbody for their valueable contribution & multiplication of ideas on this different trial.

No...No......I had a scrap Test indicator. I undressed it to know the mechanism. I used a different DTI for taking this trial.

I completely agree to the point of view that DTI is designed to make perpendicular measurements & not sideways. Also the play & friction is different on either sides. A reinshaw probe or a CMM machine will definately show no signs of such error.

This trial is to validate that does a DTI Provide consistent results when forces act from a non perpendicular position on either sides. If this trial suceeds, then we will be able to make absolute measurements also with the Dial Test Indicator & will be a landmark achievement.


A Idea - :rolleyes:
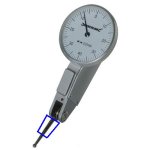
I think we need to add some balancing weight on to the dial stylus ( not on the sphere shaped portion ) but on the portion as shown in figure 45. By compensating in this way, we would get consistent results as we are compensating for side thrust & play error. I know this will require stringent trials to create the equation of balancing weight v/s the side thrust error.
Any Suggestions of how to add weight


Zirok
 

Attachments

  • 45.jpg
    45.jpg
    15.9 KB · Views: 190
I thank everbody for their valueable contribution & multiplication of ideas on this different trial.

No...No......I had a scrap Test indicator. I undressed it to know the mechanism. I used a different DTI for taking this trial.

I completely agree to the point of view that DTI is designed to make perpendicular measurements & not sideways. Also the play & friction is different on either sides. A reinshaw probe or a CMM machine will definately show no signs of such error.

This trial is to validate that does a DTI Provide consistent results when forces act from a non perpendicular position on either sides. If this trial suceeds, then we will be able to make absolute measurements also with the Dial Test Indicator & will be a landmark achievement.


A Idea - :rolleyes:
I think we need to add some balancing weight on to the dial stylus ( not on the sphere shaped portion ) but on the portion as shown in figure 45. By compensating in this way, we would get consistent results as we are compensating for side thrust & play error. I know this will require stringent trials to create the equation of balancing weight v/s the side thrust error.
Any Suggestions of how to add weight


Zirok

I think yer nutz! :D

Heavying up the dangle won't eliminate the side play without you heavy it so much the whole apparatus will show deflection!

IMO

al
 
Y'know, the pink, the teal, the green..............

the orange, the sand, the umber, may be all cutesy colors to you, :rolleyes: and a twist on the more "sensitive side" of your masculinity, :eek: if that's your gender; but it sure makes it a PITA to read!!! :mad: (Even for NON-color blind folks). :)
 
"""AMEN""" to the above reply. . . I had to take my computer (laptop) into a dark room to read that . . . YUCK !!!!

And what a confusing reply he had !!!!
 
Back
Top